Category: Brewing Guides

  • Espresso Grind Size Chart: Get the Perfect Shot

    Espresso Grind Size Chart: Get the Perfect Shot

    Grind size is the single most powerful variable in espresso. More than your machine, more than your beans, the fineness of your grind decides whether your shot lands in the sweet spot or comes out sour, bitter, or watery. The good news: the target is simple to describe, and learning to read your shots will teach you to dial in any coffee.

    Why Grind Size Matters for Espresso

    Espresso forces hot water through a compacted puck of coffee at high pressure, in about 25–30 seconds. That’s an extremely fast extraction — drip coffee gets minutes, French press gets many minutes. Because the water has so little contact time, the grind has to be fine enough to give the water enormous surface area to work with.

    Think of it as a gate. Too coarse, and water rushes through the puck too easily: it under-extracts, grabbing the sour, salty acids but leaving the sweetness behind. Too fine, and water struggles to pass: it over-extracts, pulling out bitter, drying compounds along with everything good. The right grind size is the gate setting that lets water extract exactly the balanced middle in the time you give it.

    This is why espresso demands a good burr grinder. The grind must be both fine and uniform — a mix of powder and boulders (what blade grinders produce) extracts unevenly no matter what you do, giving you sour and bitter in the same cup.

    The Target: How Fine Should Espresso Be?

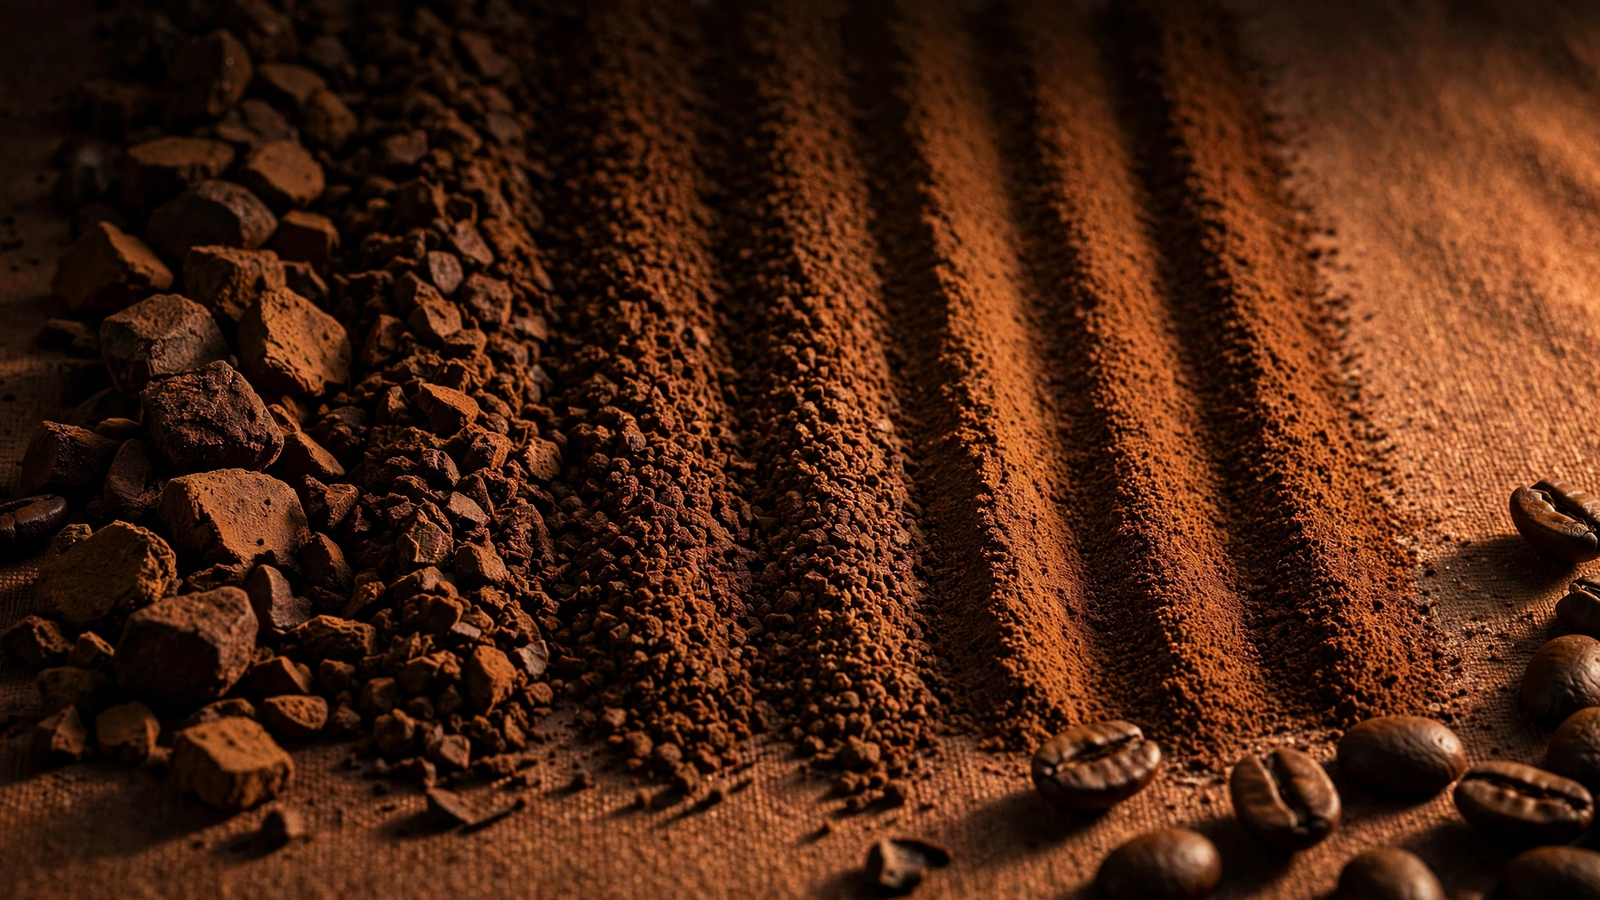
    Aim for a texture like fine table salt — finer than granulated sugar, but not powder. If you rub it between your fingers, it should feel gritty, not floury. Flour-like powder is Turkish territory, and that’s too fine for espresso; it will choke your machine.

    A few reference points:

    • Table salt: the classic reference. Espresso grind looks and feels close to this.
    • Granulated sugar: slightly too coarse for most espresso setups — a useful “a touch finer than this” marker.
    • Powdered sugar / flour: too fine. That’s Turkish coffee grind.

    Caveat: “table salt” is a starting point, not a law. The exact right fineness depends on your beans, your dose, your machine, and your taste. Grind size is always relative — what matters is learning to adjust it based on how the shot tastes and how long it takes.

    Grind, Dose, Yield, and Time: The Dialing-In Recipe

    Grind size doesn’t work alone. It works in a system with three other numbers: dose, yield, and time. The standard starting recipe for a double espresso is:

    • Dose: 18 grams of ground coffee in the basket
    • Yield: 36 grams of liquid espresso in the cup
    • Time: 25–30 seconds from the moment you start the pump

    That’s a 1:2 brew ratio (coffee in : espresso out) in 25–30 seconds, and it’s the baseline nearly every dialing-in guide starts from.

    Here’s how grind size controls the system: with dose fixed at 18g, grinding finer slows the shot down (more resistance, longer time, more extraction), and grinding coarser speeds it up (less resistance, shorter time, less extraction). So grind size is your main lever for hitting that 25–30 second window.

    Timing convention: start the timer when you start the pump (some people start at first drip — pick one method and be consistent). Weigh your yield with a small scale; eyeballing volume is unreliable because crema lies.

    Once you can reliably land 18g in → 36g out in 25–30 seconds, you’ve dialed in. Everything after that is tasting and nudging the grind finer or coarser to suit the coffee and your palate.

    Too Fine vs Too Coarse: Signs and Fixes

    Your shot will tell you which direction to move. Taste is the final judge, but time and appearance give you fast clues.

    Signs your grind is too fine

    • The shot drips slowly or chokes (barely anything comes out)
    • Shot time runs well past 30–35 seconds for a 1:2 ratio
    • Taste is bitter, harsh, dry, or ashy — the classic over-extracted profile
    • The puck looks muddy or soupy afterward

    Fix: Grind coarser in small steps — one notch or a small rotation at a time — and pull another shot. Change only the grind; keep dose and yield the same so you can actually learn what the change did.

    Signs your grind is too coarse

    • The shot gushes out, blonding (turning pale and watery) very early
    • Shot time is well under 20–25 seconds
    • Taste is sour, salty, thin, or watery — the under-extracted profile
    • Little to no crema, or crema that vanishes instantly

    Fix: Grind finer in small steps and taste again. Sourness in espresso is almost always under-extraction, and the fix is almost always a finer grind (or a slightly longer ratio — but adjust one thing at a time).

    The golden rule of adjusting

    Only change one variable at a time, and change it in small steps. If you change the grind, the dose, and the coffee all at once, you’ll never know what fixed the shot. Adjust the grind, pull a shot, taste, repeat. Dialing in usually takes 2–4 shots with a new bag of beans. That’s normal — it’s the craft, not a failure.

    Adjusting Grind for Roast Level

    Roast level changes how easily coffee extracts, so it changes where your grind needs to sit:

    • Dark roasts are porous and brittle — they extract easily and quickly. Start a touch coarser than your usual setting, or they’ll run fast and taste bitter/ashy. Dark roasts also produce more fines and can choke more easily, another reason to open the grind up slightly.
    • Medium roasts are the middle ground — your standard table-salt setting usually lands right.
    • Light roasts are dense and extract reluctantly. They typically need a finer grind (and sometimes a slightly longer ratio, like 1:2.5) to pull out their sweetness and avoid sourness. If your light roast tastes sour even at a fine grind, try extending the yield before going finer still.

    This is also why you re-dial with every new bag: a new roast, a new origin, even a few days of aging changes the ideal grind. Coffee degasses as it ages, so beans often need a slightly finer grind a week or two after roast than they did fresh.

    Espresso Grind Size Chart

    Here’s the full spectrum of grind sizes across common brew methods, with espresso highlighted. Think of it as a map: espresso sits firmly on the fine end, with only Turkish and moka pot grinding finer.

    Brew Method Grind Size Texture Reference Approx. Brew Time
    Turkish coffee Extra fine Flour / powdered sugar ~2–3 min (ibrik)
    Espresso Fine Fine table salt 25–30 seconds
    Moka pot Fine–medium-fine Slightly coarser than table salt ~5 min
    Pour over (V60) Medium-fine Raw / turbinado sugar 2.5–3.5 min
    Drip machine Medium Coarse sand / sea salt 4–6 min
    AeroPress Medium-fine to medium Table salt to sea salt (varies by recipe) 1–2 min
    French press Coarse Breadcrumbs / peppercorns 4 min
    Cold brew Extra coarse Coarse peppercorns / rough crumbs 12–24 hours

    The pattern: shorter contact time needs finer grind; longer contact time needs coarser grind. Espresso’s 25–30 seconds is the shortest brew on the chart (outside Turkish), which is exactly why it needs the finest grind of any mainstream method.

    How Your Grinder Affects Dialing In

    Not all grinders make dialing in equally easy. Two distinctions matter:

    Conical vs. flat burrs

    Both can make excellent espresso. Conical burrs (cone-shaped, common in entry-level espresso grinders) tend to produce a bimodal particle spread — mostly fine with some larger particles — which many people find forgiving and which tends to emphasize body and chocolatey flavors. Flat burrs (two parallel rings, common in higher-end grinders) produce a more uniform particle size, which tends to emphasize clarity and separation of flavors. For a beginner, either works; don’t let burr geometry drive your purchase decision. Burr quality and adjustment precision matter far more than the shape.

    Stepped vs. stepless adjustment

    • Stepped grinders click between fixed settings. The steps are sometimes too far apart for espresso — setting 5 chokes, setting 6 gushes, and there’s nothing in between. Some stepped grinders designed for espresso use very small steps to solve this.
    • Stepless grinders adjust continuously, so you can always find the exact setting between “too fine” and “too coarse.” This is the gold standard for dialing in espresso.

    If you’re shopping for a grinder specifically to pair with an espresso machine, an espresso-focused grinder with fine adjustment steps (or stepless adjustment) will save you real frustration. The [AFFILIATE LINK: Baratza Encore ESP] is a popular real-world example of an entry-level grinder built with espresso-range adjustment in mind — no invented specs or prices here, just check its current listing.

    One more practical note: single-dose your dialing in. Weigh 18g of beans, grind all of it, and use all of it. Grinding from a full hopper introduces retention and stale-ground variables that make learning harder. A scale that reads to 0.1g is the cheapest, highest-value upgrade in all of espresso.

    Frequently Asked Questions

    Can I use pre-ground coffee for espresso?

    It will make something brown that comes out of the portafilter, but it won’t be dialed-in espresso. Pre-ground coffee is ground to one fixed size that almost certainly doesn’t match your machine, dose, and beans — and it goes stale within hours of grinding. If you’re serious about espresso, a grinder isn’t optional equipment.

    My shots are sour even though I grind fine. What now?

    First, confirm with a scale and timer that you’re actually hitting roughly 1:2 in 25–30 seconds — sourness with a fast shot means grind finer. If the numbers look right and it’s still sour, the likely culprits are: a light roast that wants a longer ratio (try 1:2.5), water that’s too cool, or channeling (water punching a hole through the puck — work on even distribution and tamping).

    My shots are bitter even though I don’t grind that fine. What now?

    Bitter with a slow, long shot means grind coarser. But bitterness can also come from water that’s too hot, a dark roast pushed too far, or an overlong ratio. Check your time first: if you’re running 40+ seconds for 1:2, the grind is the problem. If your time is fine, look at roast and temperature.

    How often do I need to adjust my grind?

    Every new bag of beans, and subtly as a bag ages over 1–3 weeks. Changes in humidity and temperature can shift things too. Experienced home baristas do a quick “dial-in check” shot with each new bag and then barely touch the grinder until the next one.

    Does grind size matter for pressurized (dual-wall) baskets?

    Much less. Pressurized baskets have a tiny valve that creates back-pressure artificially, so they’re forgiving of grind size — that’s their whole point, and why they work with pre-ground coffee. But they also cap your quality ceiling. When you’re ready for the control described in this guide, switch to the unpressurized (single-wall) baskets.

    What’s the difference between espresso grind and Turkish grind?

    Turkish is ground to a flour-like powder — noticeably finer than espresso. Espresso ground that fine would choke the machine. If your grinder’s finest setting produces powder, back it off a bit for espresso.
  • Best Pour Over Coffee Makers for Beginners (2026)

    Best Pour Over Coffee Makers for Beginners (2026)

    Best Pour Over Coffee Makers for Beginners (2026)
    The best beginner pour over coffee maker is the Clever Dripper (~$28) — it forgives bad technique with steep-and-release brewing. Also great: Kalita Wave 185 (~$40), Hario V60-02 ($13), Melitta 1-cup (~$10–13), Chemex 6-cup (~$47–67), and the Fellow Stagg X set ($69).

    The Best Pour Over Coffee Makers for Beginners

    Prices checked October 2026. Brewer prices are stable, but they do move — confirm the current price before buying.

    Pour-over coffee looks intimidating — gooseneck kettles, spiraling pours, timers — but it doesn’t have to be. A beginner-friendly brewer is one that forgives imperfect technique and still makes a good cup. That forgiveness mostly comes down to geometry: flat-bottomed brewers (Kalita Wave, Stagg X) and immersion-style brewers (Clever Dripper) are much harder to mess up than conical brewers (V60), where your pour speed and pattern directly control the result.

    This guide picks six brewers that are genuinely good starting points, from $10 to $69, with honest notes on who each one suits.

    Quick Picks

    • Best for absolute beginners: Clever Dripper (~$28) — full-immersion steeping means technique barely matters. Nearly impossible to brew a bad cup.
    • Most forgiving true pour-over: Kalita Wave 185 (~$40) — flat-bottomed bed and slow drain rate even out sloppy pours.
    • Best under $15: Hario V60-02 ($13) — the classic conical dripper. Highest ceiling, steepest learning curve, cheapest ticket.
    • Best ultra-budget starter: Melitta 1-Cup (~$10–13) — wedge-shaped, dirt cheap, filters at any grocery store.
    • Best for brewing for two: Chemex 6-Cup Classic (~$47–67) — brews and serves in one beautiful carafe; thick filters make an exceptionally clean cup.
    • Best premium beginner set: Fellow Stagg X Pour-Over Set ($69) — vacuum-insulated flat-bottom dripper plus carafe, filters, and built-in ratio aid. The complete kit.

    Comparison Table

    Brewer Street Price Capacity Filter Type Difficulty
    Clever Dripper ~$28 500ml (16.9 oz) #4 paper Easiest
    Kalita Wave 185 ~$40 2–4 cups (~500–700ml) Kalita Wave 185 Easy
    Hario V60-02 (plastic) $13 1–4 cups V60-02 paper Moderate
    Melitta 1-Cup ~$10–13 1 cup #2 paper Easy
    Chemex 6-Cup Classic ~$47–67 30 oz (6 cups) Chemex bonded (thick) Easy–Moderate
    Fellow Stagg X Set $69 10 oz (single cup) Stagg X paper Easy

    Clever Dripper — Best for Absolute Beginners

    [AFFILIATE LINK: Clever Dripper]

    The Clever Dripper cheats — in the best way. You add coffee and water, put the lid on, wait about four minutes, then set it on your mug. A valve in the base opens automatically and the brewed coffee drains through a standard #4 paper filter. Because the coffee steeps fully immersed (like a French press), there’s no channeling, no dry spots, and no technique required. It tastes like a French press without the sediment.

    It also doubles as a conventional pour-over dripper if you set it on the mug from the start, so it grows with you. Made of BPA-free Eastman Tritan copolyester, it’s durable, dishwasher-safe, and includes a lid and coaster. If your biggest fear is “I’ll do it wrong,” this is the brewer that removes that fear entirely.

    Specs: 500ml (16.9 oz) practical capacity · uses standard #4 filters · BPA-free Tritan · made in Taiwan · includes lid and coaster

    Pros
    – Nearly impossible to brew a bad cup — technique-independent
    – French-press body without the sludge
    – Cheap, durable, and travel-friendly

    Cons
    – It’s immersion, not true percolation — you won’t learn classic pour-over technique
    – You taste the filter paper less here, but the cup is less “bright” than a V60 brew

    Kalita Wave 185 — Most Forgiving True Pour-Over

    [AFFILIATE LINK: Kalita Wave 185]

    The Kalita Wave is the beginner’s pour-over in the classic sense: you still pour water over grounds, but its flat-bottomed bed and three small drain holes control the flow rate for you. A sloppy, uneven pour that would ruin a V60 brew still comes out sweet and balanced on a Wave. The wavy filters also touch the brewer less, which keeps the temperature stable.

    The stainless steel 185 brews 2–4 cups (about 500–700ml) and is built to last decades — it’s dishwasher-safe and essentially indestructible. The only real catch is that Kalita’s own Wave filters are proprietary and cost more than generic #4s, but they’re widely available. This is the brewer we recommend most to people who want to learn pour-over without the early frustration.

    Specs: Stainless steel · 115 × 115 × 66mm · brews 2–4 cups (~500–700ml) · uses Kalita Wave 185 filters · dishwasher-safe · made in Japan

    Pros
    – Flat bed + restricted flow = very forgiving of pour technique
    – Produces a sweet, full, balanced cup
    – Buy-it-for-life build quality

    Cons
    – Proprietary filters cost more than generic ones
    – Stainless steel cools slightly faster than plastic (preheat it)

    Hario V60-02 (Plastic) — Best Under $15

    [AFFILIATE LINK: Hario V60-02 Plastic]

    The V60 is the icon — the 60-degree cone with spiral ribs that competition baristas actually use. The plastic 02 size (1–4 cups) is the smart beginner buy: it’s cheap at $13 from Hario USA, nearly unbreakable, lightweight for travel, and plastic retains heat better than ceramic or glass, which helps consistency. The large open drain hole means your pour controls everything, which is both the V60’s superpower and its learning curve.

    Buy it knowing the first week will be inconsistent. But when it clicks, the V60 makes the brightest, most articulate cup of any brewer on this list — and many competition winners brew on the exact $13 plastic model, not the fancy ceramic ones. Get the 02 size (not the 01) so you can brew a full mug comfortably.

    Specs: AS resin plastic · 137 × 116 × 102mm · 1–4 cup capacity · uses V60-02 paper filters · BPA-free, dishwasher-safe · made in Japan · $13 at Hario USA

    Pros
    – Highest flavor ceiling of any beginner brewer
    – $13 — the cheapest way into serious pour-over
    – Light, durable, competition-proven

    Cons
    – Steepest learning curve here — early cups can be sour or uneven
    – Needs V60-specific filters (worth buying the genuine Hario ones)

    Melitta 1-Cup — Best Ultra-Budget Starter

    [AFFILIATE LINK: Melitta 1-Cup Pour-Over]

    Before specialty coffee had opinions, Melitta Bentz invented the pour-over filter in 1908 — and the humble plastic Melitta cone is still one of the easiest ways to start. The wedge shape with a single small drain hole restricts flow on its own, so even a careless pour brews a decent cup. It sits directly on your mug, uses #2 filters available at any grocery store, and is top-rack dishwasher-safe.

    Sold inexpensively (a two-pack runs about $13 at major retailers), it’s the “prove the concept” brewer: spend almost nothing, brew better coffee than a drip machine by the weekend, and decide whether you want to go deeper. The Tritan Signature Series version is shatter-resistant and worth the small premium if you find it.

    Specs: Plastic (Signature Series: shatter-resistant Tritan) · 1-cup · uses #2 Melitta cone filters · fits standard mugs · dishwasher-safe (top rack)

    Pros
    – Cheapest entry point on this list
    – Grocery-store filters — no specialty ordering
    – Wedge geometry is naturally forgiving

    Cons
    – One cup at a time; not for households
    – The cup is pleasant but unremarkable — limited ceiling

    Chemex 6-Cup Classic — Best for Brewing for Two

    [AFFILIATE LINK: Chemex 6-Cup Classic]

    The Chemex is the only brewer on this list that also serves as the carafe: brew directly into the 30 oz borosilicate glass vessel, then pour at the table. The thick bonded Chemex filters are the real story — they produce an exceptionally clean, sediment-free cup with almost no bitterness, which makes the Chemex unusually forgiving for a conical brewer. It’s simple, elegant, and has been in MoMA’s permanent collection since before pour-over was cool.

    The 6-cup Classic (CM-6A) with the wood collar and leather tie suits one or two drinkers; note Chemex counts a “cup” as 5 oz, so 6 cups is really about two generous mugs. Filters are proprietary, thicker than standard, and cost more — budget for them. Handle it with care: it’s beautiful glass, not a travel mug.

    Specs: Non-porous borosilicate glass · 30 oz capacity · 8.5″ H × 5.1″ diameter · uses Chemex bonded filters (FS/FC/FSU-100) · polished wood collar with leather tie · made in USA

    Pros
    – Brews and serves in one vessel — great for two
    – Thick filters make an exceptionally clean, sweet cup
    – Timeless design that lives on the counter

    Cons
    – Proprietary filters are pricier than standard papers
    – Glass is fragile; the 6-cup is really ~2 mugs (5 oz “cups”)

    Fellow Stagg X Pour-Over Set — Best Premium Beginner Kit

    [AFFILIATE LINK: Fellow Stagg X Pour-Over Set]

    If you’d rather buy one complete kit than assemble pieces, the Stagg X set is it: a vacuum-insulated stainless steel flat-bottom dripper, a double-wall borosilicate tasting glass/carafe, 20 (some listings say 30 — count varies) custom paper filters, and a built-in ratio aid that doses your coffee without a scale. The steep 70° walls and a no-clog hole pattern give even extraction, and the insulation keeps brew temperature steady — one less variable for a beginner.

    It’s a single-cup brewer (10 oz), so it’s built for one — grab the larger Stagg XF set (~$103) if you brew for two. At $69 it’s the priciest pick here, but everything you need is in the box and it looks like it belongs in a design museum. Fellow’s grind of customer support is also genuinely good, which matters when you’re starting out.

    Specs: Vacuum-insulated stainless steel dripper · double-wall glass carafe · 10 oz capacity · custom Stagg X flat-bottom filters · built-in ratio aid · 9.3″ H × 4.2″ W (set)

    Pros
    – Complete kit — dripper, carafe, filters, dosing aid
    – Flat-bottom geometry + insulation = forgiving and consistent
    – Beautiful, well-made, great support

    Cons
    – Single-cup only — couples need the XF
    – Proprietary filters; priciest beginner option

    What Else You Need (It’s Less Than You Think)

    A brewer alone makes mediocre coffee. Three companions matter far more than upgrading the dripper:

    • A gooseneck kettle — not strictly required on day one (any kettle works with the Clever Dripper or Melitta), but a controlled pour transforms V60 and Kalita brewing. The Fellow Stagg EKG is the gold standard; any basic stovetop gooseneck gets you 80% of the way.
    • A scale — the single biggest upgrade to consistency. A 1:16 ratio means nothing if you’re eyeballing. Any 0.1g kitchen scale with a timer works; no need for anything fancy to start.
    • A burr grinder — pre-ground coffee goes stale in days and you can’t adjust grind size, which is the main dial you turn in pour-over. A decent hand grinder like the Kingrinder K6 or an entry electric like the OXO Brew is the move; see our budget espresso grinder guide for options that also cover pour-over.
    • Filters — buy the right ones for your brewer (they’re not interchangeable), and buy genuine. Rinse paper filters with hot water before brewing.

    A 60-Second Technique Starter

    Forget spiral pour artistry for now. This works on every brewer above:

    1. Ratio: 1:16 — 20g coffee to 320g water makes a solid 10–11 oz mug. Weigh both.
    2. Grind: medium, like sea salt (slightly finer for V60, slightly coarser for Chemex).
    3. Water: just off boil, ~200°F (93°C). No thermometer? Boil, wait 30 seconds.
    4. Bloom: pour ~50g water, swirl gently, wait 30–45 seconds while the coffee degasses.
    5. Pour: add the rest of the water slowly over ~1 minute, keeping the water level steady. Total brew time: 2:30–3:30.
    6. Taste and adjust: sour or thin? Grind finer next time. Bitter or harsh? Grind coarser. That’s 90% of pour-over “technique.”

    FAQ

    What’s the easiest pour-over method for a complete beginner?
    The Clever Dripper, by a wide margin. It’s technically immersion brewing, so there’s no pour technique to learn — steep, set on mug, done. If you want a true pour-over, the Kalita Wave 185 is the most forgiving.

    Flat-bottom vs. conical — which is better for beginners?
    Flat-bottom (Kalita Wave, Stagg X) is more forgiving because the even coffee bed and restricted flow even out inconsistent pouring. Conical (V60, Chemex) gives you more control — and more ways to go wrong. Start flat, graduate to conical.

    Do I need a gooseneck kettle to start?
    Not for the Clever Dripper, Melitta, or Chemex — any kettle works since precision matters less. For the V60 and Kalita Wave, a gooseneck makes a real difference and is worth buying early.

    How much coffee should I use?
    Start at a 1:16 ratio (1g coffee to 16g water). 20g coffee + 320g water is a standard mug. Adjust to taste from there — stronger isn’t better, balanced is better.

    Are paper filters really necessary? Can’t I use a metal filter?
    Paper filters remove oils and fine sediment, which is what makes pour-over taste clean and bright. Metal filters make a heavier, murkier cup — closer to French press. For the brewers in this guide, use the paper filters they’re designed for.

    Which brewer is best if I want to brew for two people?
    The Chemex 6-Cup (30 oz) or Kalita Wave 185 (up to ~700ml). The Stagg X and Melitta 1-Cup are strictly single-serving; for the Stagg line, step up to the XF set.